Category:

Printer Setup

123.hp.com/ojpro8740 Setup

by printerhelp

123 HP Officejet Pro 8740 Printer Setup

123.hp.com/ojpro8740 – Innovative Plan for Superb Office Output, More Paper Capacity and Progressive Scanning

Accomplish cost-cutting and increase efficiency with reasonable, professional-quality color in a complete print, fax, scan, copy package, suitable for small trade from 123.hp.com/ojp8740. Prints professional-quality color-for a lesser amount. Get color graphics and black text to keep your business vibrating. Link to familiar devices and easily print from various devices like a smartphone, tablet, or notebook PC. Redefine prospects with manageability solutions that help you faultlessly control your print environment.

123.hp.com/ojpro8740 Printer Functions

123 HP OJP 8740 Business apps

Avail the new and latest business tips from 123.hp.com/setup 8740, news and more with free apps-delivered on your agenda. Just touch and jab the touchscreen to open, scan and print.

123 HP OJP 8740 Print Forward Design

Get great speeds for two-sided print and scan related work with laser-like paper, and realm real estate with a space-saving design.

123 HP OJP 8740 Wireless printing

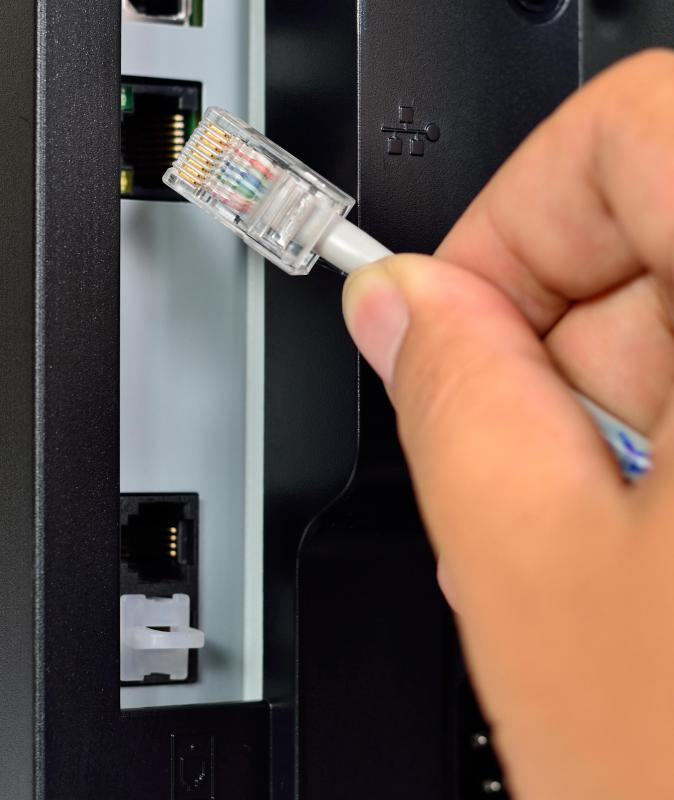
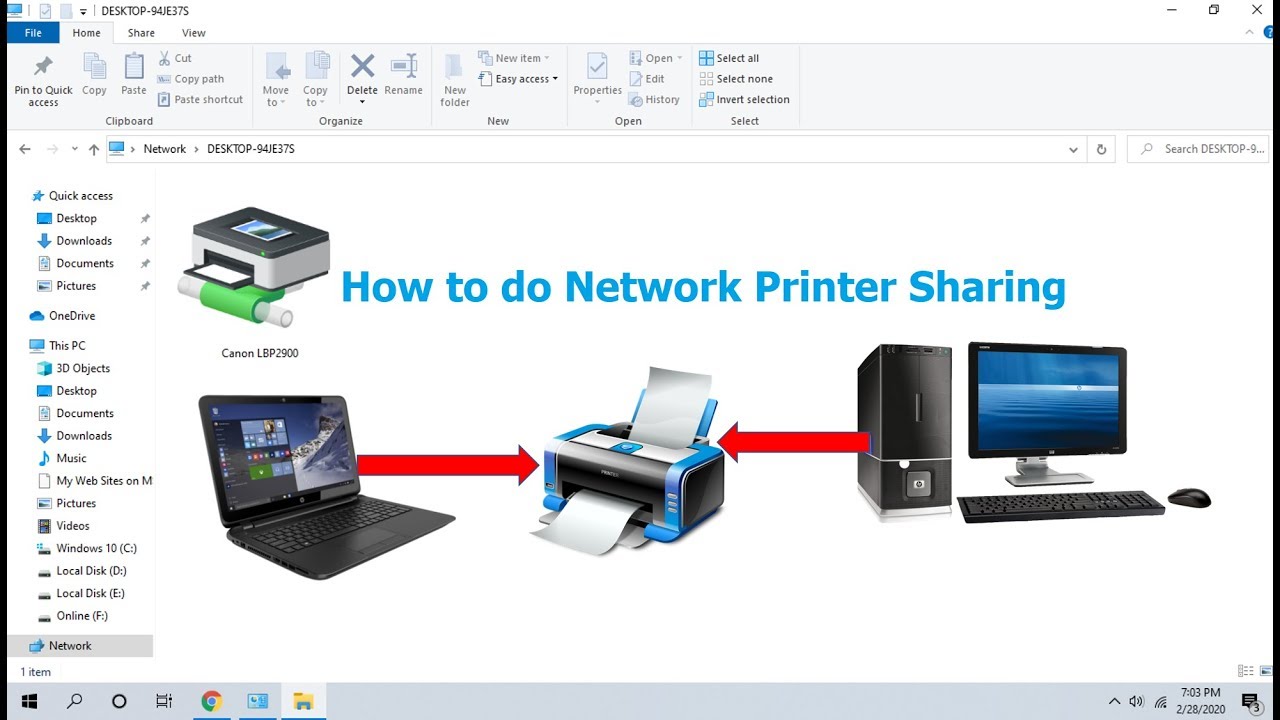
Print and share with notebooks or PCs on a current wireless network, using the freedom of built-in wireless. Link printing devices to PCs firmly with built-in Ethernet ports.

123.hp.com/ojpro8740 Mobile Application

123 HP OJPro 8740 Airprint

HP Officejet Pro 8720 airPrint is an exceptional feature with which you can print a document or a photo from an Apple device by connecting your HP compatible printer to a wireless network. If you are using an AirPrint compatible 123.hp.com/ojpro8740 printer then follow the below instructions.

Read More

123 HP OJPro 8740 ePrint

HP Officejet Pro 8720 ePrint is a cloud-based service that generates prints easily from your Android, Smartphone or Tablets. Print from anywhere with a live Internet connection. You can email the document or photo you need to print directly to the 123 HP ePrint enabled printer.

Read More

HP OJPro 8740 Cloud Print

Google Cloud Print allows you share printers with just a click. Any type of app when connected to a web-connected device, can use Cloud Print. You can connect a printer to your Cloud Print account and start printing on it. Handling printers and print jobs in Cloudy-ready printers is simple.

Read More

123.hp.com/ojpro8740 Driver Manual Download

123 HP Officejet Pro 8740 Driver

Download the Updated HP Officejet Pro 8740 Driver:

  • Avail the latest version of the printer driver from 123.hp.com/setup 8740 us within seconds.
  • Click the link to download HP Officejet Pro 8740 driver for Windows and Mac compatible printer.

Driver Download

123 HP Officejet Pro 8740 Manual

Download the Easy HP Officejet Pro 8740 Manual:

  • Our easy step-by-step instructions help you setup and troubleshoot printer on your own.
  • Click the link to download HP Officejet Pro 8740 manual for your corresponding 123.hp.com/ojpro8740 printer.

Manual Download

123 HP Officejet Pro 8740 Printer Quick Tips

  • It is vital to see that your printer head is in a proper position while you switch off your 123 hp ojp 8740 printer.
  • You may have to choose the draft or economy alternative with the use of the cartridge. It is advisable to use 300 less DPI for consistent printout.

123.hp.com/ojpro8740 Printer Troubleshooting

123.hp.com/ojpro 8740 – Slow Printing (Windows)

Step 1: Monitor the print driver settings

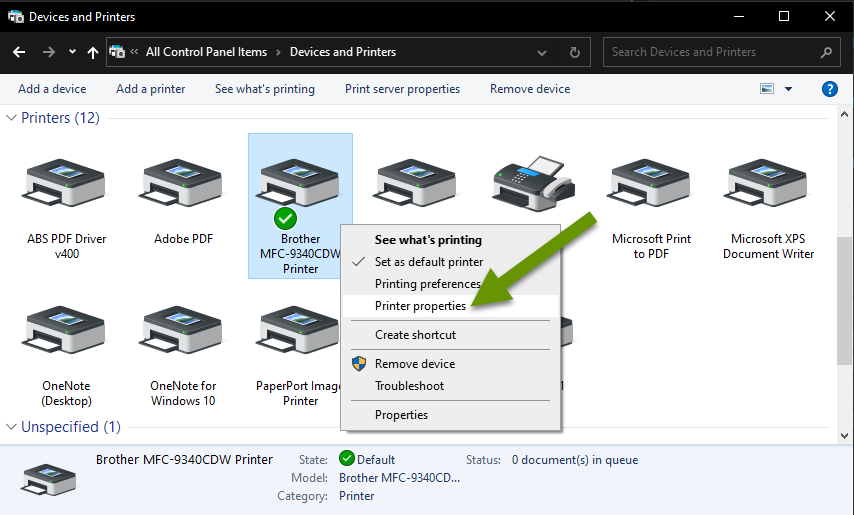
  • Browse in Windows for 123.hp.com/ojpro8740 printers, and then choose Devices and printers in the list of options.
  • Double-click the icon for your printer and set preferences.
  • Locate the paper type information.
  • In the Paper type area, ensure Plain Paper is nominated.
  • In the Quality Settings area, ensure Draft or Normal is nominated.
  • Select OK or Apply to ratify the changes, shut the 123 HP Officejet Pro 8740 printer driver window, and then shut the Devices and Printers window.

Step 2: Uninstall the print driver

  • If your printer links to the computer with a USB cable, detach the cable from the printer or 123.hp.com/setup 8740
  • Browse in Windows for programs and features, then choose Programs and Features in the list of options.
  • In the menu of installed programs, choose your HP printer name, then select Uninstall or Yes.
  • Trail the on-screen instructions to finish the software removal.
  • Reboot the computer.

Step 3: Upgrade the printer firmware

  • Ensure the printer is on and linked to the computer, through your network or a USB cable.
  • Choose your operating system if essential.
  • Choose Firmware, then select Download.
  • If a firmware section is not recorded, a firmware upgrade is not available. Skip to the next step.
  • Choose Use HP Download and Install Assistant (Recommended) from 123.hp.com setup 8740 , select Next, and then choose Install now.
  • Browse in the HP Printer Update window to view if your printer serial number (123 hp ojpro 8740) exhibits.
  • When the update is finished, select OK.
  • If you linked a USB cable for your networked 123.hp.com/ojpro8740 printer, then eliminate the USB driver that was added by Windows.

Step 4: Monitor the network status (wired and wireless connections only)

  • On your computer, examine the wireless signal strength by tapping the wireless connection icon in the Windows taskbar. If the signal strength is low, place the router, computer, and printer closer.
  • Ensure there are no added strains on your network, like downloading or streaming services. Liable to your bandwidth, these actions can knowingly affect print speed.
  • If the printer is linked to the network with an Ethernet cable, ensure the cable connections are proper.
  • Reboot your router by unplugging it, pausing for 10 seconds, and plugging it back in.

User Intervention Required’ Error When Printing (Windows)

Step 1: Monitor for flashing lights or error messages

Examine the 123.hp.com/setup 8740  printer’s control panel for any blinking lights or error messages.

Step 2: Release the print queue

  • Browse in Windows for local services, and then select view local services in the list of options.
  • In the list of services, locate the Print Spooler.
  • Right-click Print Spooler, and then choose Stop.
  • After the service has been stopped, shut the service window.
  • Search Windows for C:, and then choose Windows in the list of options.
  • Double-click the System folder, and then double-click the spool folder and PRINTERS folder.
  • Remove all the files in the folder.
  • Attempt to print from 123.hp.com/ojpro8740 printer.

Step 3: Use a printing troubleshooting tool (Windows 7 and later)

  • Browse Windows for Troubleshooting.
  • The Troubleshooting window exhibits.
  • Choose Use a printer, from the Hardware and Sound category.
  • Select Next, and then trial the prompts.
  • Attempt to print.

Step 4: Allocate a manual IP address to your printer (wireless connections only)

  • Find the URL(s) for Embedded Web Server
  • On your computer, access an Internet browser.
  • Enter the URL address for the EWS in the browser address bar, and then click on Enter.
  • If a website security certificate exhibits in the Internet browser, select Continue.
  • The EWS webpage for the printer exhibits.
  • On the EWS webpage, select the Network
  • In the Network section, choose Wireless (802.11), and then select Manual IP.
  • On the Network Configuration Report, find the IP AddressSubnet Mask, and Default Gateway.
  • On the EWS webpage, enter the IP Address, Sub net Mask, and Default Gateway numbers from the Network Configuration Report in the matching fields, and then choose Apply. For more 123.hp.com/setup 8740 Printer queries reach our exprts to fix your problems.
  • Attempt to print from 123.hp.com/ojpro8740 printer.

Disclaimer: printerssetup.org is an independent website for providing you with information regarding HP printers. This site doesn’t have specific association with “HP” and its services. All the information and images used in this website are for informational purpose only. We do not sell products or services of HP in any form. We do not provide any warranty or services associated with manufacturer. You should approach the manufacturer for the same.

0 comment

 How to Printer Unboxing Setup?

Your new printer is right behind you. Need help to get started? Don’t be too fussy about getting started. Unboxing Setup, install your printer with our guidance. Our experts are here at every juncture to lend a helping hand by providing you with the unparalleled guidance.

Avail our support right now and attain an exceptional solution in minutes.

How to Unbox the Printer?

Are you purchasing a printer? When you buy a printer,there are certain mandatory steps you need to follow prior to printing. One such step is the unbox setup. Follow the steps below for the process.

Step 1:Unpack the printer

Prior to unpacking, examine the list of contents in the shipment box as it may vary by country/region.

  • Truncate the printer. Discard all the packing materials in the exterior of it. Pull the output tray out. Look at the interior of the printer.
  • Hold the handles of the ink cartridge access door to unseal it. Eradicate all the packing materials from the interior of the printer.
  • After discarding them,seal the cartridge access door. Take out all the hardware in the box prior to discarding it.
  • Plug in one end of the power cable to the hind-side of the printer and the other end to the wall socket.
  • Once you are done with the connection process, switch on the printer. To on it, press the power button on the front panel.

Step 2:Install the ink cartridges

Ink cartridges are necessary for the printing process . Utilize genuine ink cartridges that are compatible with the printer model.

  • Clutch the handles and then pull the ink cartridge access door to unlock it. Wait for the carriage to slide to the middle of the printer.
  • Take out the new cartridges from the printer’s package. Be cautious to touch only the black plastic on the ink cartridge.
  • Eliminate the plastic tape. While holding the ink cartridge,you should not touch the ink nozzles.This may result in ink failure.
  • Grasp the ink cartridge by its sides with the nozzles facing the printer. Install the ink cartridge into its slot.
  • Push the ink cartridge at an upward angle into the empty slot , shove the ink cartridge until it fixes into place. After installation , seal the door.

Step 3:Load paper into the tray

Without a paper, you cannot get the hard copy for your messages. When you use a paper,make sure that it is not bend or stapled.

  • Heave the input tray. While feeding the paper into the input tray,ensure that it is compatible with the printer.
  • Move the paper width guides to their farthest position.Feed a stack of paper into the input tray.
  • Place the paper with the short edge moving forward and the print side facing you. Shove the stack until it stops .
  • Adjust the paper width guides to the right until it snaps against the edge of the paper. While adjusting , make sure that you do not bend the edges.
  • Once you are done with the above steps,pull the output tray and tug out the output tray extender.

Step 4:Install the printer software

After performing all the steps, aligning the ink cartridges is required to get quality printouts for your documents or photos.

  • After loading the paper, the printer automatically prints the alignment page. Elevate the scanner lid.
  • Position the alignment page with the printed side down on the scanner glass. Place it based on the engraved guides on the glass.
  • Seal the scanner lid. Press the Start Copy button or Start Copy Color button on the control panel of the printer.
  • Now,the printer aligns the ink cartridges. The printer’s hardware is configured. It is necessary to install the software.
  • To install the software,you need to use the software installation CD or navigate to our website 123.hp.com/setup to download it.
0 comment

The following subjects explain how to alter the ink in Canon printer. Ink cartridges are substituted when the ink of the cartridges is below or empty. An error message is displayed on the printer control panel in order to replace the cartridge.

A quick method to substitute the Canon printer ink cartridge

  1. Ensure that the Canon printer is activated. Open the production paper tray.
  2. Head up the scan door on top of the printer.
  3. Wait until the holder of the Fine Cart slides to the substitute place.
  4. Take out the vacuum ink cartridge.
  5. Unpack a fresh ink cartridge and remove the protective ribbons.
  6. Place the cartridge in the holder and close the cover.
  7. Ensure that the cartridge cover is correctly locked.
  8. Close the scan deck and finish the substitution process.

How to change Ink Cartridge in Canon Printer

A replacement of ink cartridges can be carried out when an error message appears in the printer or computer display control panel. The message happens when the ink in the cartridges is below or any problems with the ink are removed before working on changing the ink in canon printers. The message is sent.

Before you start the replacement process, you can check the ink level. The level is controlled with a control panel in your desktop or laptop for your Canon printer or driver software. The fresh cartridges can be bought from the producer’s shop. Implement the following instructions to replace the cartridge after purchase.

Canon printer power when it is switched off. Raise the printer’s paper production tray. Open the top lid of the scanner. Now the holder of the cartridge is moving into place. Wait for the cartridge to settle. Do not touch the cartridge as you move.

Lift the ink cartridge locking cover. Remove the replacement cartridge. Give the ancient cartridges carefully to get rid of strains. Maintain ancient cartridges for recycling aside. Take a fresh tin cartridge and remove it and peel the orange tapes.

Do not shake the cartridge as it breaks out and generates strains. Never paste back the protective tape after it has been removed. Make sure that the cartridge does not touch electric contacts or print head nozzles. Insert the fresh ink cartridge in its holder. Set the color disc to the left and black to the right at the slot.

Close the cartridge cover and lock it. Push the cartridge gate down to click. Make sure the cartridges are correctly locked after closing. Make sure that both cartridges are fitted. Lift the scanning lid slightly to set its original position. Close the scan door and hold it strongly.

After replacing the ink cartridges, the Canon printer automatically begins cleaning the printer head. Do not print until the Canon printer finishes printhead cleaning. Adjust its position if the printhead is misaligned. For more data on how to change the canon printer ink, please refer to the instructions in the Canon printer handbook.

0 comment

Fix the “Windows Cannot Connect to Printer Error”

Network Printer Troubleshooting

Common Printer Issues

At times, when people send papers or print jobs to a network printer, an error message is received that Windows can not connect to the printer. The error message is sometimes denied, while other times the error is only displayed. There are numerous reasons why this pops up on Windows, but depends mostly on the setup.

In order to fix the error, you first check if a network printer is installed with a LAN port or if a printer is linked to a different system and shared in the network. You have to solve the problem differently accordingly. The following troubleshooting steps for network printer can be used as a guide.

Troubleshooting Shared Network Printer

Test these steps in the event of the printer being connected to a system and shared with that computer and you are trying to add the device to another network PC.

Add Printer Wizard
  • Search for Add Printer from the Start Menu search box and click on the link that will appear in the results of your search.
  • You must select which printer to configure when the Add Printer wizard is opened. Select a Network Printer or printer attached to a different computer for this purpose.
  • You must then use a special\ character to enter the shared impression path, the name of the pc to which the device is shares, the name of the printer, the name of the imprint, and then click the Next button and select Connected.

The shared printer must be connected. If, though, you receive the above error, you can try to add a local device to your printer. To solve printer problems, follow the steps below. Make it a point to only do this if the printer is connecting to and sharing the network with another system.

  • You have to select Local printer from Add Printer wizard attached to this computer’s checkbox and delete the box below.
  • Click Creating a new port checkbox on the next window and then click the Local Port in the drop down list.
  • You’re prompted in a port name by clicking Next. The path to the printer must be entered by the port name graphical box.
Printer Port

A Wireless or LAN Network Printer troubleshooting

Follow the steps below to fix that the Windows is unconnected to your printer error if you have a printer attached.

  • Select the Local printer that is attached to that computer and choose a new port, as indicated in the previous step. You must select Standard TCP or IP port instead of selecting a Local Port in the download.
New Printer Port

Then the IP address key for the printer. If you do not recollect the IP address, please print the configuration sheet of your printer. You ought to be able to do so directly from the printer menus–check the user manual provided by the printer manufacturer if you have doubts.

Enable Windows Firewall File and Printer Sharing

Unless Windows Firewall prevents connectivity, you can not connect to a printer. Make sure that an exception is made to the computer and PC on which the printer and file is attached via Windows Firewall. Follow the following steps to allow the option.

  • To open the control panel from the Start Menu, click the Windows button.
  • Select Windows Firewall from the control panel and click Exceptions to ensure that the checkbox for File and Printer Sharing has a tick.
  • Choose the checkbox if not. This ensures that the app doesn’t block the connection.
Windows Firewall

Update the Printer Drivers

If you add the device to the Windows 7 PC and the system hosting the printer has Windows Vista or XP, you will experience the printer error. You will need to download and install the drivers on the host machine for Windows 7 from the website of the manufacturer. If you are attempting to make a Windows 7 connection to the printer, the OS driver should be available for installation from the host PC.

Disable the antivirus blocking software

If you have an antivirus installed on your computer that blocks connections, deactivate the sound and then try connecting to a sharing printer. Deactivates the Antivirus software that blocks connections If it is the antivirus blocker that is the underlying cause behind the connection problem, the disabled software should resolve it.

If you still get across the Windows when you print on a network environment and you can not connect to the printer error, contact our technical support professionals via the above mentioned toll-free number for advanced network printer troubleshooting…CONNECT TO PRINTER ERRORPRINTER ERROR

0 comment

How to Share a Network Printer in Windows 10?

Windows 10 Printing Issues

Common Printer Issues

In Windows 10, a printer is available for multiple network computers. To do this, you have to configure your printer’s share settings, plug the device into the main PC via a USB cable or wirelessly and enable it. The network and printer should be powered and connected.

Note, when sharing the network, it should be configured on the main PC and on other systems too. The system should be connected and powered. In addition, make sure you know the name of the main PC. See “Configure sharing settings” and “Find computer name” at the end of this post for more information. For more.

Steps in the main computer to share the printer

As mentioned below, there are several ways to do this. Note also that you can edit the share name of the printer if you want. It is used by a different PC when connecting to it.

  • Using Settings
    • Click Start, then click Settings and navigate > Printers & Scanners to Devices.
    • Click on Manage the printer that you need to share and.
    • Choose the Sharing tab to click Printer Properties.
    • To share your printer, click on the tab..
Share Printer Device
  • Using Control Panel
    • The Control Panel key and select it in the search bar.
    • Click on Devices and Printers below Hardware and Sound.
    • Right-click on the device to share and click on Properties in the Printer.
    • Click Share this printer on the Share tab.

Steps in connecting the common printer to a different system

  • Using Settings
  • Select Start and go to Devices > Printers & Scanners, click Settings.
  • Click Add a printer underneath.
  • Choose your printer and click Add Device.
  • If you don’t see it, click The printer I’m not looking for.
Add Printer Device
  • Click on Shared Print Name in the Add Printer dialog and enter the name of the system and share name of the printer in the format, \PCnameprintername.
  • Clicking Next to install will prompt Windows to install the printer driver.
Shared Printer
  • Using Control Panel
    • Type and click on the Control Panel in the search box of the taskbar.
    • Click on Devices and Printers below Hardware and Sound and add a printer.
    • Select the desired printer and click Next.Install the printer driver  when Windows is prompted.
    • Click on Printer I want is not displayed if you do not see the printer you require..
  • Select a shared printer by name in the dialog box called Add a Device and enter the name of the main PC and share printer using \PCnameprintername format
    • Click Next to complete the installation of the printer driver.

Steps to Configure Sharing Settings

Default settings are often enabled for sharing printers. If not, take the steps below to activate the settings.

  • Using Settings
    • Choose Start, click Settings, and go to Internet & Network > Wi-Fi.
    • Click Change advanced sharing options below the associated settings.
    • Enhance the section called Private in the dialog box entitled Advanced sharing settings. Then, click Turn on network discovery below Network discovery.
    • Click Turn on file sharing and printer sharing below.
Advanced Printer Settings
  • sing Control Panel
    • Type the Control Panel and select it on the search box of the taskbar.
    • Choose the network and the web and navigate to the network and shared centre > Modify settings for further sharing.
    • Search and expand the section called Private in its dialog box. Then, select Turn to Network Discovery below.
    • Select Turn on file and printer sharing from below.

Steps to find the computer’s name

You’ll need the name of the main PC to link another computer to the previous printer.

  • Settings steps to find PC name
    • Click Windows in the taskbar
    • The key in the Computer Name in his search box.
    • Then, select View the name of your PC.
    • You will see the system under the device name.
  • Path to Control Panel Find Computer Name
    • Select the control key and select it in the search box of the taskbar.
    • To Navigate > See the computer name, click on the System and Security button.
    • You will see the same under the computer name.
System Details

If you have questions or configurations about Windows 10, please contact the professional printer support team via the toll-free number 904-877-9329 to find out how to solve them quickly.

0 comment

How to Set Up Bluetooth printing In Windows 7 PC

Common Printer Issues

Bluetooth printers provide an easy way to send and print Bluetooth-enabled documentation. Even if your computer has not Bluetooth, it is possible to enable it in one USB slots by adding a Bluetooth dongle. Then enable Bluetooth to install the accompanying software on your PC and add a compatible printer to that computer to start printing. This means you can still print documents through Bluetooth if your printer goes offline because of wired connection problems.

You must pair a discoverable device with the PC to enable Bluetooth printing and file sharing. Use the steps below to set the computer as you can find it to nearby Bluetooth devices. This way, you can count on Bluetooth connectivity to help resolve your printer problems on Windows 7.

  • Search in the search box for devices and printers and open that by clicking the Start button on the desktop
  • Under Devices, right-clicking on Windows PC and select Bluetooth settings from the pop-up menu in the next Control Panel window.

In the next Bluetooth Settings dialog, you can insert the Bluetooth-enabled system tick mark on the checkbox, under Discovery. In other words, other Bluetooth devices must allow you to find your computer, so select the respective options.

Now combine your tablet or mobile devices to send print jobs into your system. To do so, navigate to or switch to the Bluetooth settings on your mobile phone, make it visible or visible to nearby Bluetooth devices and select the computer Bluetooth from available devices. If this prompts you to type a pair passkey, tap the pair option on both ends and the Bluetooth pair is completed in a couple of seconds. The key will be matched.

To add a discoverable printer in the device list of the computer, do this:

  • Navigate to Devices and Printers, as above. To add a discoverable printer in the computer lists.
  • Then, in the Control Panel window, click Add the printer button and in the next dialog, select Bluetooth print. Windows searches a detectable unit and displays it in the dialog box, when the Bluetooth-enabled printer is on.
Hardware And Sound
  • Click on the printer and follow the instructions and you will be nice to go.
Add A Device

Please contact our online printer service providers if you would like help resolving the problem with your printer.

0 comment